|
 |
| 1) Please review the
general
Custom Graphics Installation Instructions to become familiar
with the preparation of the finished surfaces and methods of
installation. |
| 2) Cut the graphics apart
from the kit sheet. Carefully cut each piece so that approximately
1/8" (.64cm) of the excess backing and application paper is exposed. |
| 3) The stripe kit is set
for a 1" (25.40mm) space between the center stripe and the two (2)
outer stripes. Thus, mark with a
grease pencil, fine line tape or other temporary marking device
where the stripes are to be placed. You will use these marks to
place your stripes. |
|
Prior to installing the center Hood stripe, carefully
remove the Washer Nozzles for easier installation. |
|
|
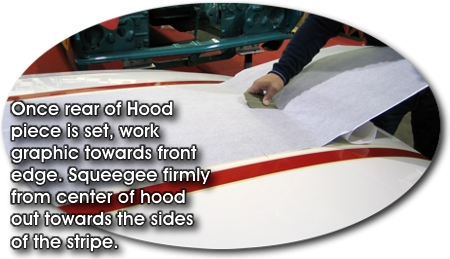
4) Most of the stripes, with the exception of
pieces "d" & "g", are pretty
straight-forward as far as installation goes. All the stripes have an
approximate .0625"-.125" (1.5875mm-3.175mm) margin at each end. So, simply center the
stripes in the area and install. We usually install from the center of
the stripe and work to each end with the squeegee. This is done by
simply peeling approximately 2-4" (5.08cm-10.16cm) of the backing paper from the center,
folding each side of the backing paper slightly, and "hinging" the
graphic from the center. |
| 5) Suggested order of
installation for the center stripe is as shown in Blue numbers.
Due to the fact that an overlap (approximate .125" [3.175mm]) is
desired for pieces that require a splice, following the order of
installation is critical. Side stripes can be placed at 1"
(25.40mm) spacing from the center stripe in any order. |
| 6) Piece "a" has
relief cuts that will allow easier installation due to the
area's compound curves. Piece "i" should overlap at the bottom
approximately .125" (3.175mm). |
|
 |
|
|
Center Stripe
piece "g" - Rear Lid |
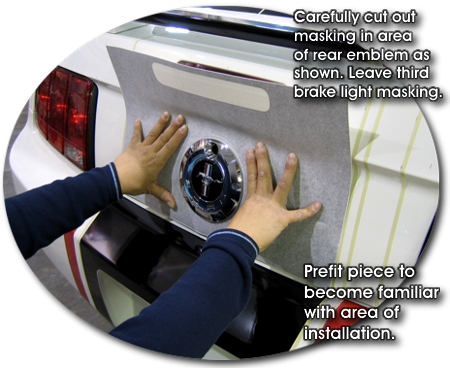 |
Piece "g" can easily be installed
into the concave area of the rear lid by closely following the
directions noted herein. |
 |
The "center hinge" method is
suggested for this piece. Carefully lining up the piece with the
bottom edge of the lid and making sure the piece is centered on the
rear emblem will ensure that the opening for the third brake light
will line up correctly. |
 |
Work from the center of the
emblem up into the lid's concave area. Firm pressure from your
fingers is best when working the piece into the roll. |
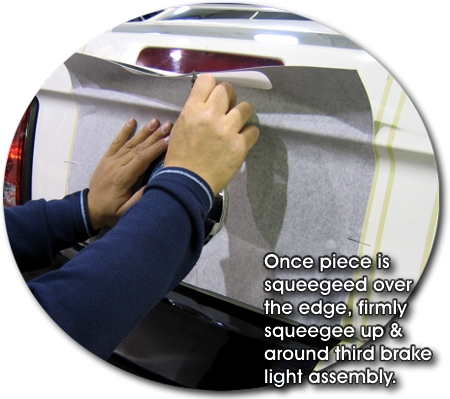 |
Once over the edge, this piece
should "snap" over into place for further squeegeeing. As noted
above, if positioned correctly, cutout for third brake light should
line up well. If cutout is slightly off, careful trimming of the
brake light area may be necessary. |
 |
Finish installation of this piece
by working the stripe down from the center of the emblem to the
bottom edge of the lid. |
|
|
|
|
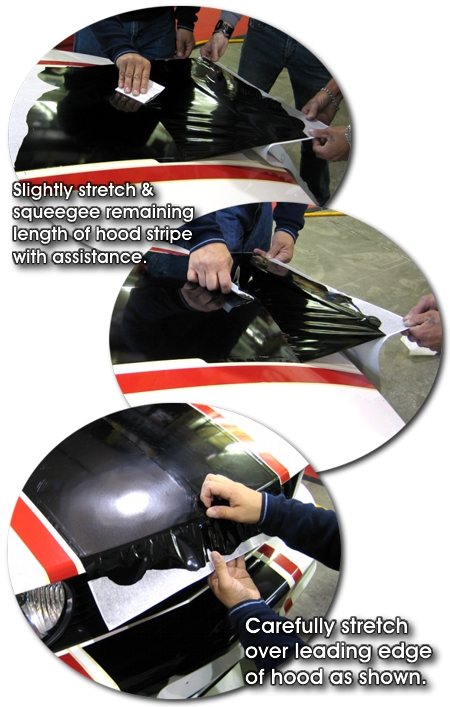
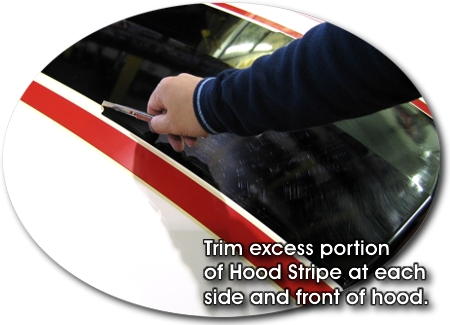
Trimming stripes on painted surfaces requires a light
touch. If you see motor oil seeping out through the paint, you know
you've cut too deep. A good rule of thumb for trimming our 2 mil vinyl
material is to let the weight of the knife drag over the vinyl. Rather
than putting pressure on the knife, which can result in cutting into the
paint, a new sharp blade and the weight of the knife will generally be
enough to pierce the film, which usually is enough to remove the excess
vinyl. |
|
When installation of the Hood stripes is complete, simply cut an "X"
in the Washer Nozzle holes located in the hood and re-install the
Nozzles through the vinyl. |
|
In the event a new piece is required, don't fret.
While it's frustrating that a little piece of vinyl can give us so much
grief, just remember that the worst case scenario is the you just have
to purchase another one - it's certainly not the end of the world. We
suggest swearing a bit and moving on. |
|
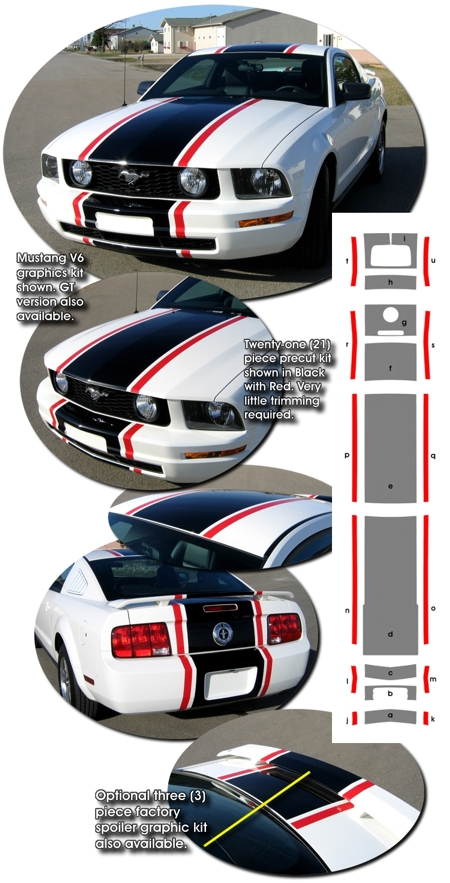
Optional three (3)
piece Factory Spoiler (ATD-FRDMSTNGGRPH14) and "Trimmable" Spoiler (ATD-FRDMSTNGGRPH46)
kits are available
for $25.95. |
|
If your
Mustang has a factory Hood Scoop, please review our
Technical Bulletin for an important installation tip. |